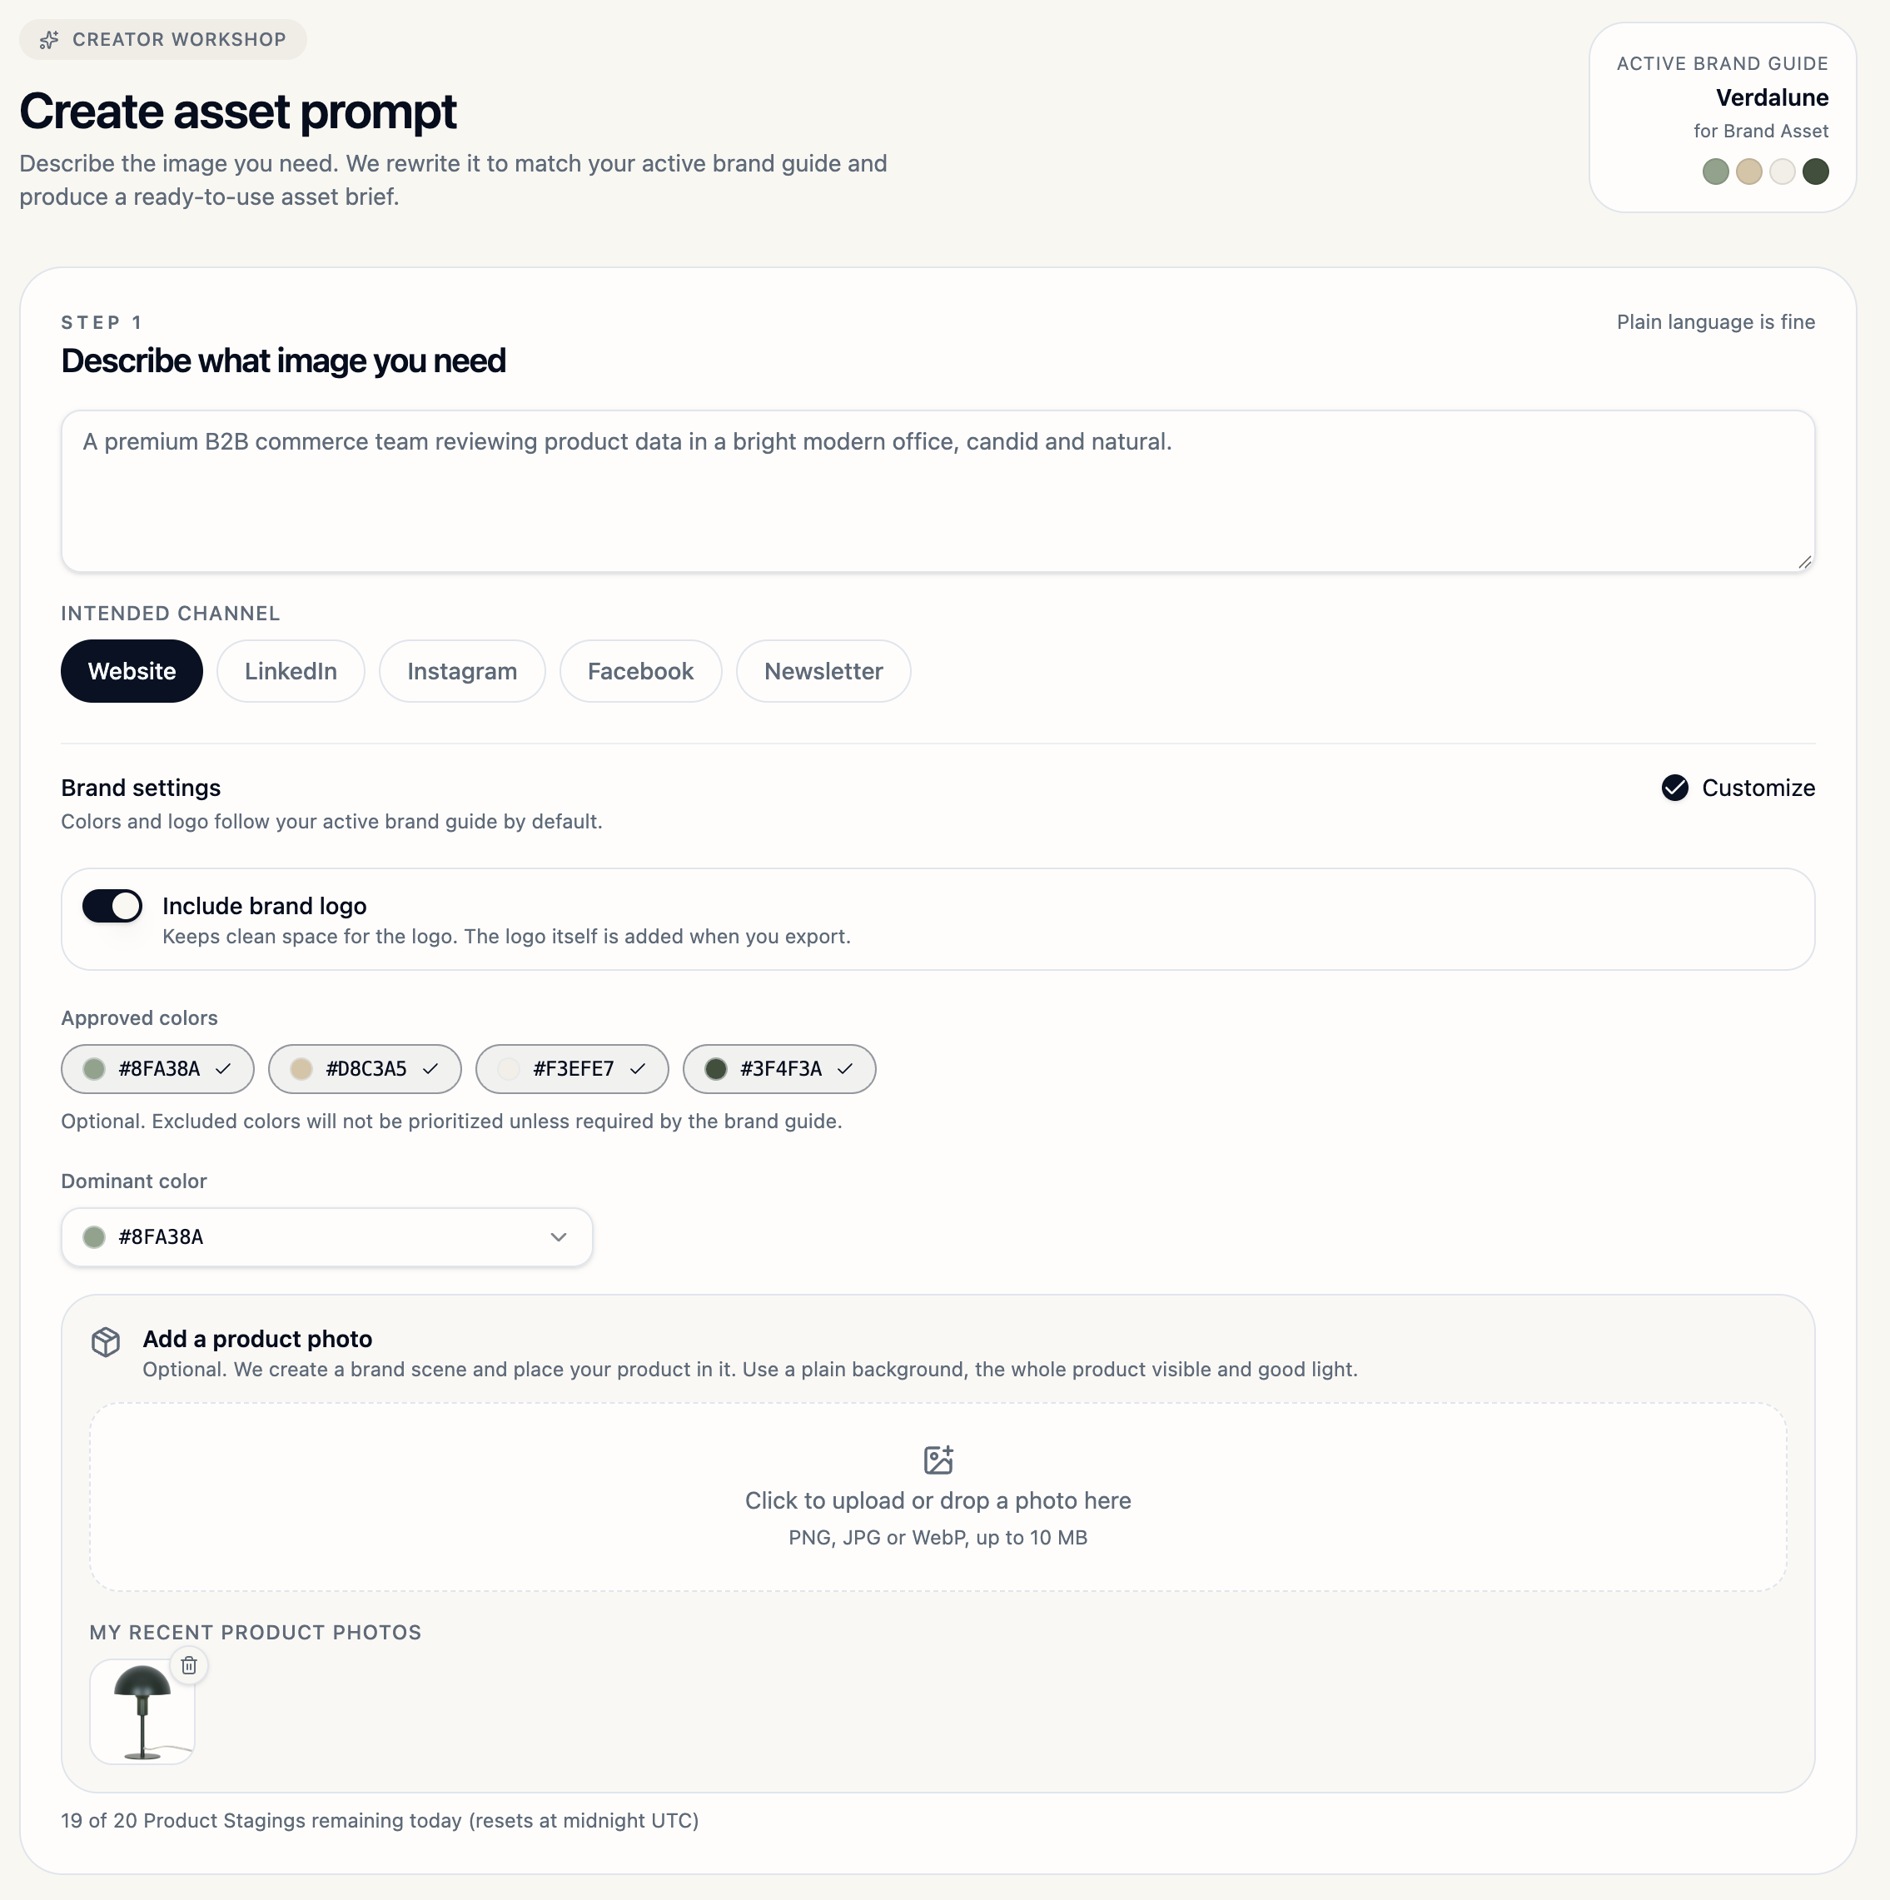
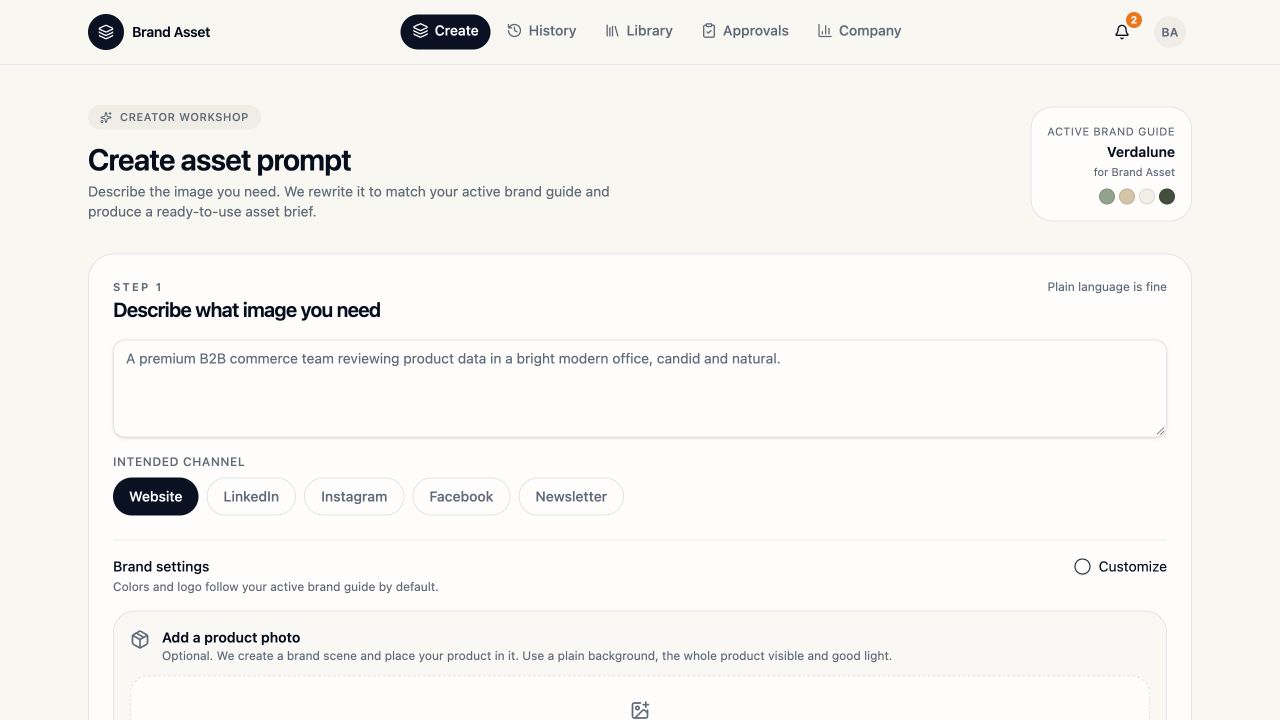
Describe the image you need
Open Create and confirm the Active Brand Guide. Start with a plain-language prompt. For example, “Two people reviewing stoneware samples over tea in a bright room.” Choose the Intended Channel, such as Website, LinkedIn or Newsletter. Under Brand settings, use Customize to choose whether to include the brand logo and which approved colours to prioritise. Include brand logo reserves space in the composition. The logo itself is added at export. If your workspace has the premium Product Staging add-on, you can add a product photo here. Use a well-lit photo showing the whole product against a plain background. Upload a PNG, JPG or WebP up to 10 MB or select a recent photo.
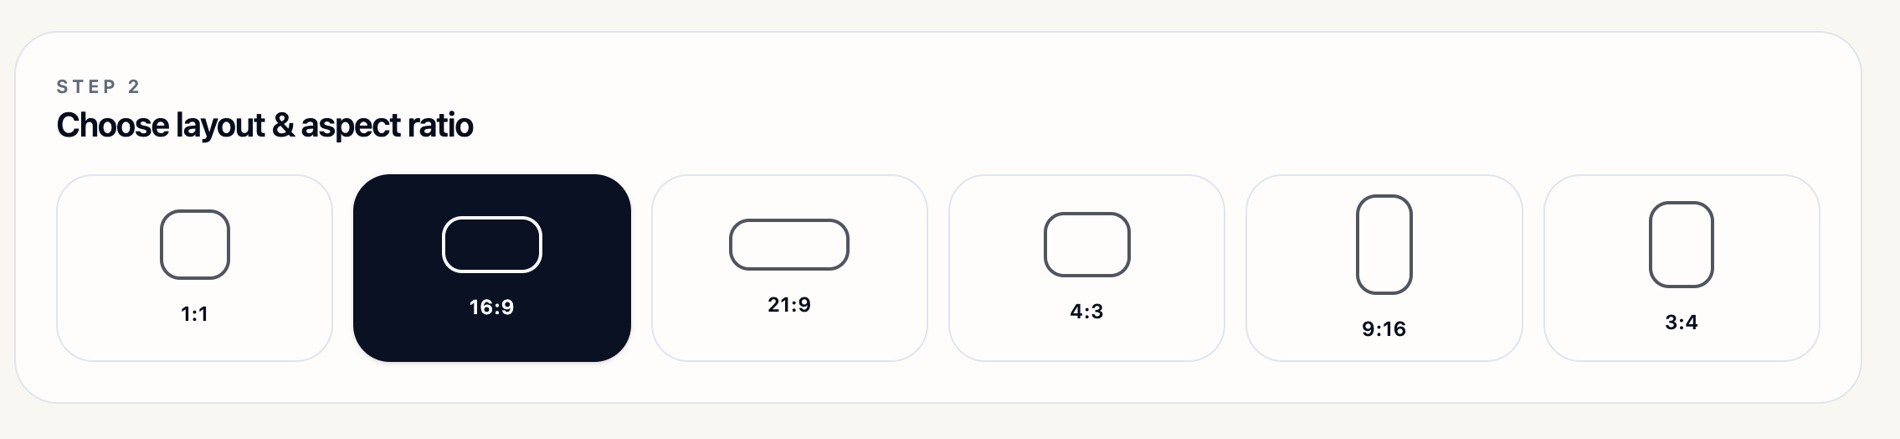
Choose the layout and aspect ratio
Pick the format for the placement. Use 16:9 for a wide website banner, 1:1 for a square post or 9:16 for a vertical story. The available ratios are 1:1, 16:9, 21:9, 4:3, 9:16 and 3:4.
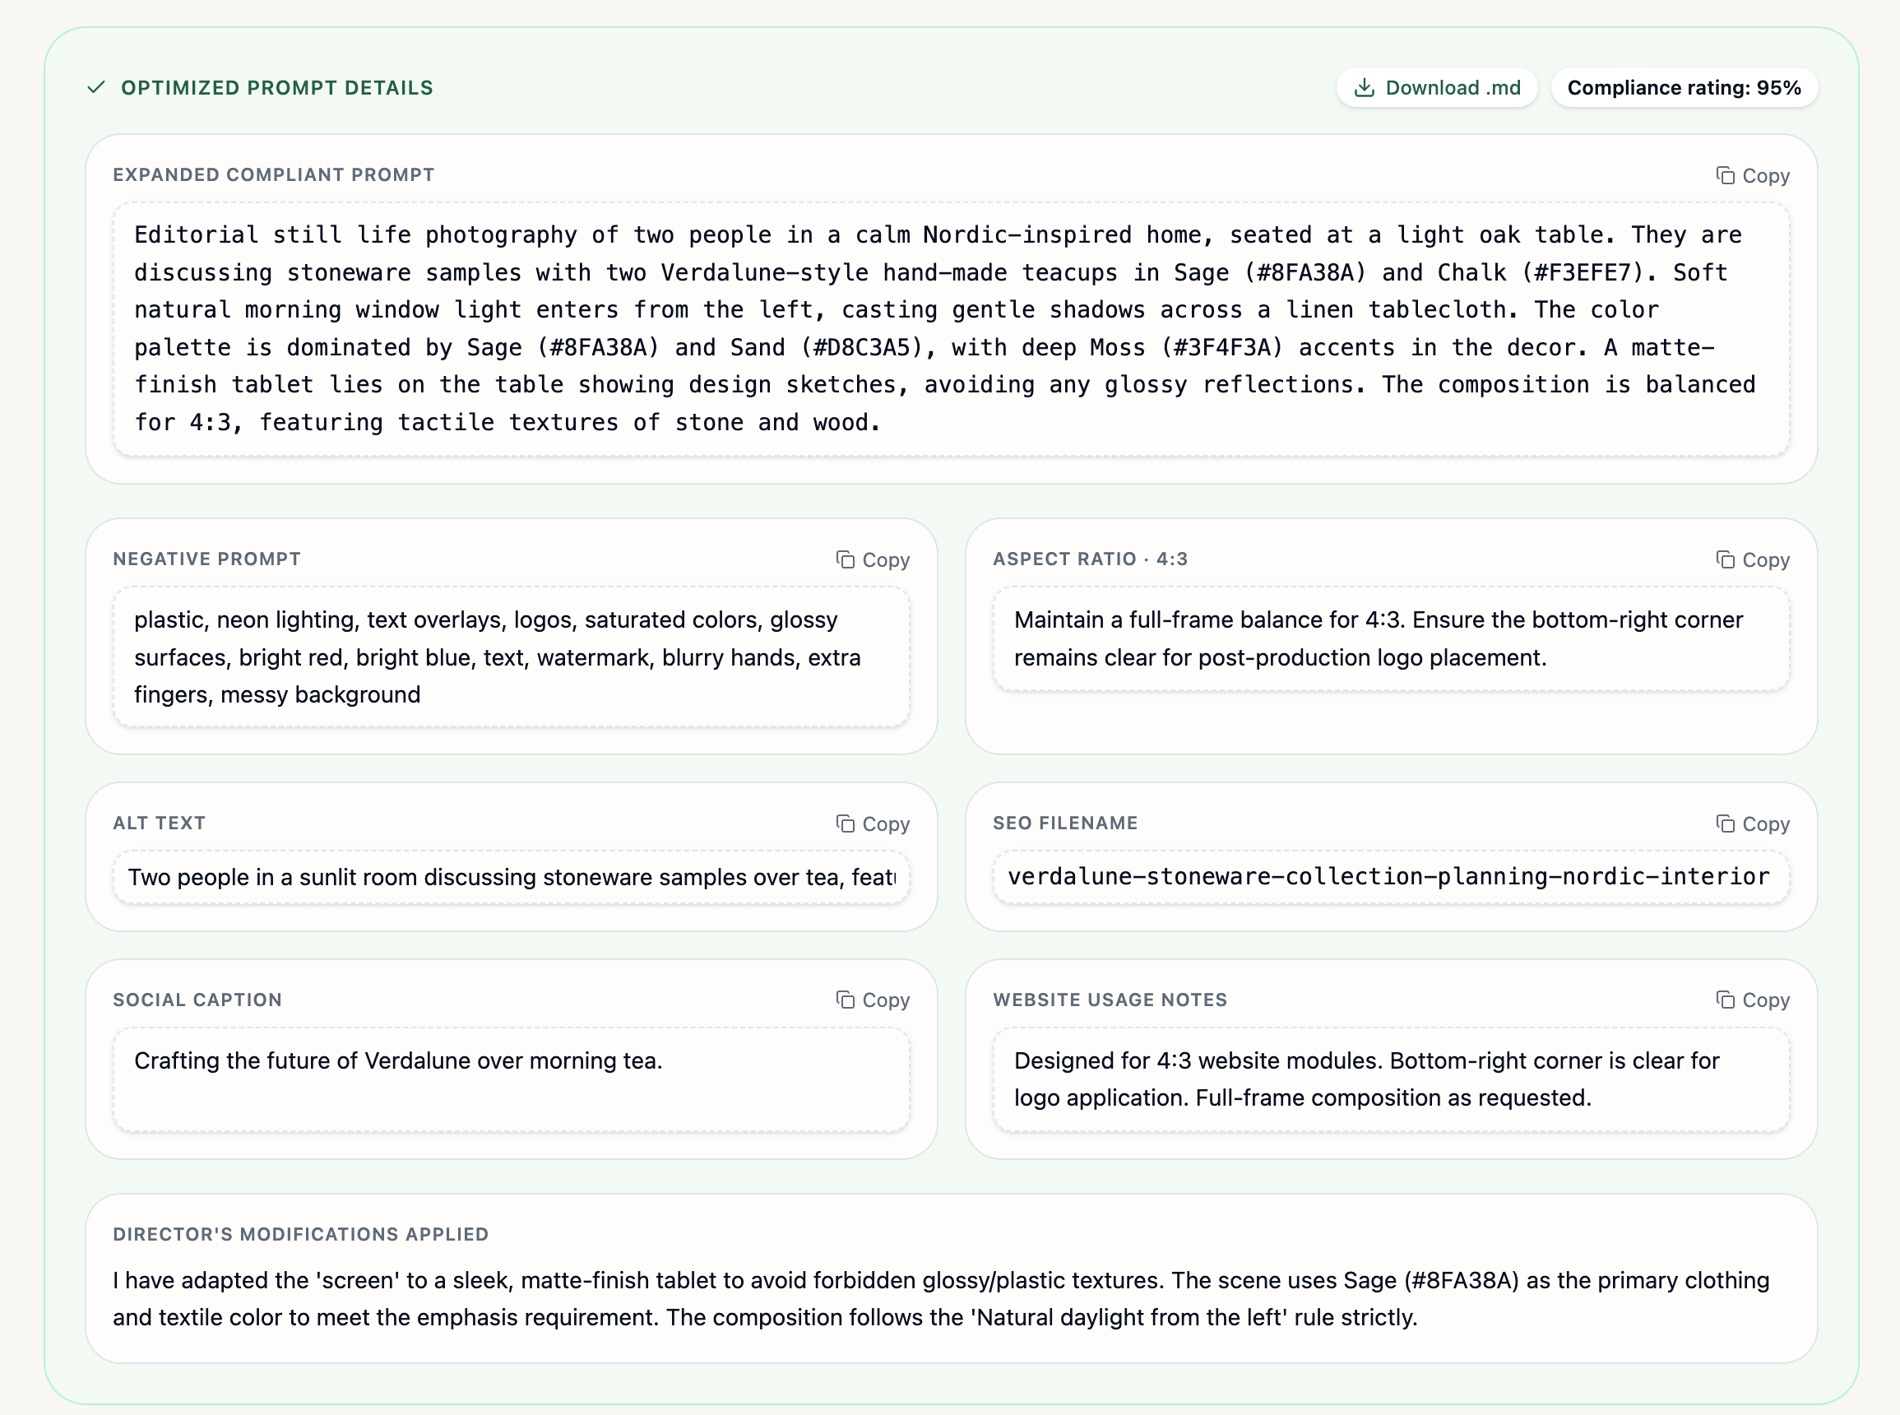
Optimise and review the prompt
Select Auto-optimize prompt (strict conform). Brand Asset expands your original request and checks it against your company’s active Brand Guide. In Optimized prompt details, review the expanded prompt, compliance rating, negative prompt, framing and modifications. The brief can also include alt text, an SEO filename, a social caption and usage notes. Check that the result still reflects your intent before generating.
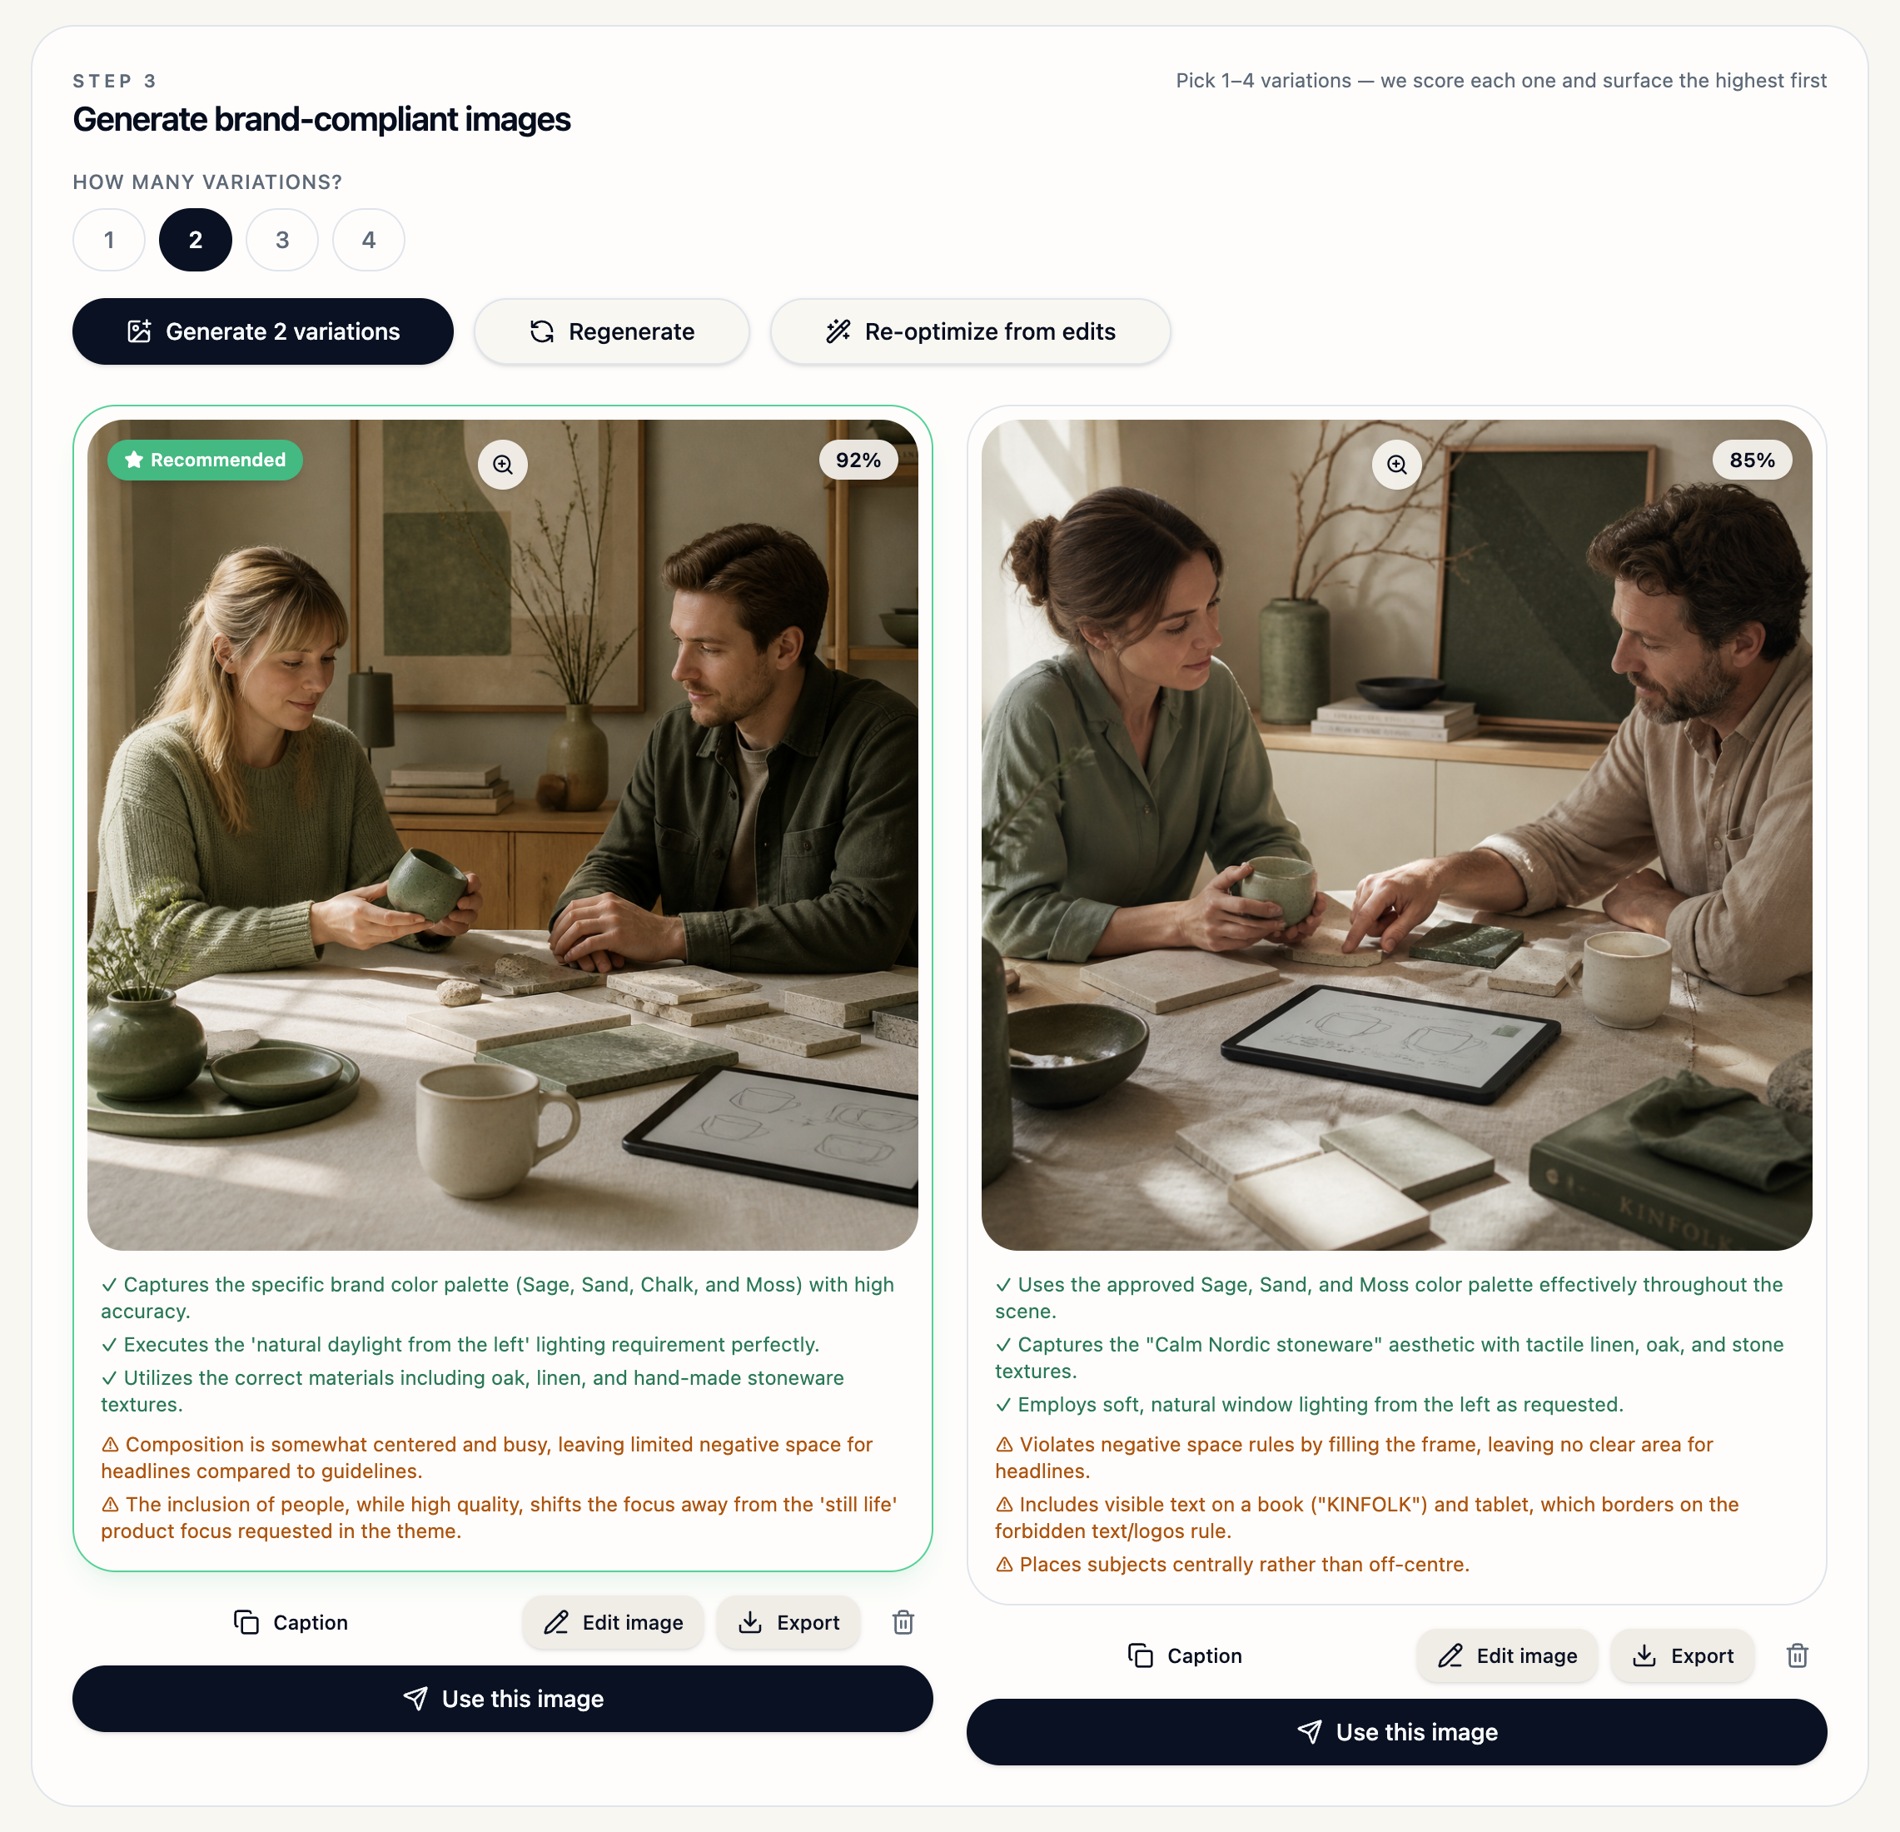
Generate and compare one to four images
Choose 1–4 variations and select Generate. Brand Asset scores each image and surfaces the highest-scoring result first. Compare the scores, checks and warnings, then inspect the images at full size. The result cards offer Caption, Edit image and Export. Select Use this image to submit an eligible result. Results below 80% compliance need refinement or regeneration before they can be submitted.
Refine the results or generate new ones
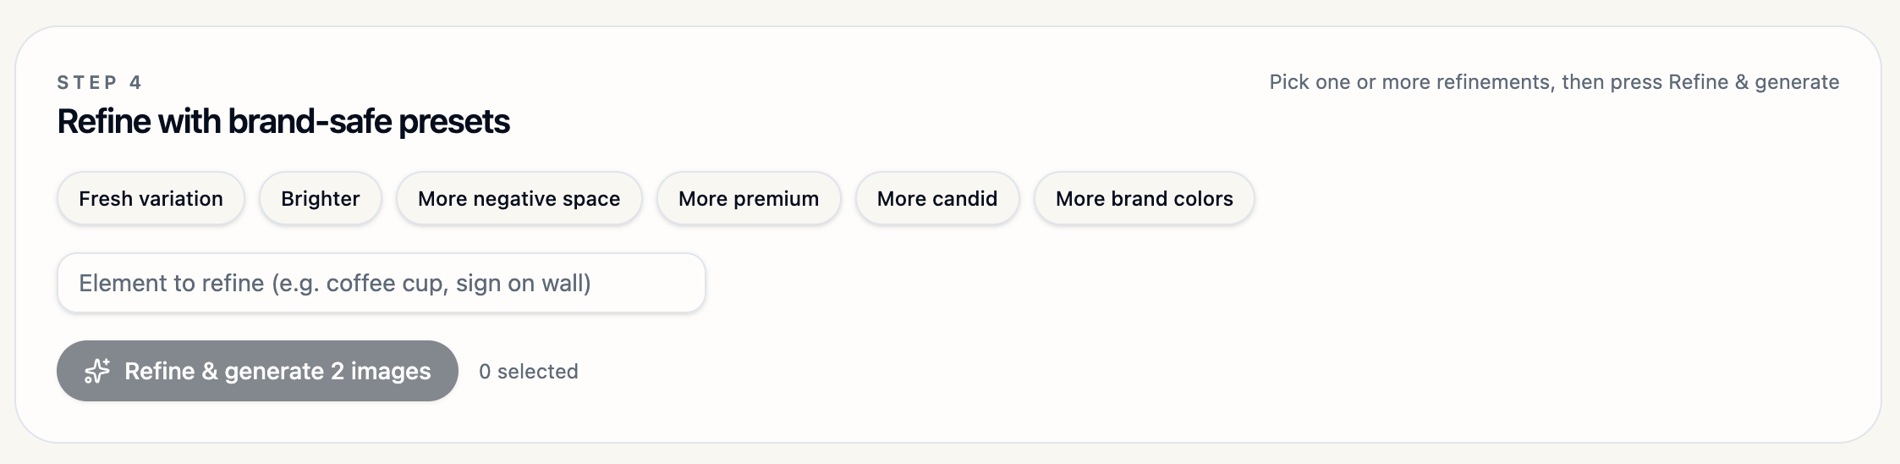
Use Regenerate for another set of images. For a more directed change, choose one or more brand-safe presets such as Brighter, More negative space or More brand colors. Optionally name an Element to refine, then select Refine & generate. If you changed the brief, use Re-optimize from edits to check the updated direction. Compare the new results before selecting one.
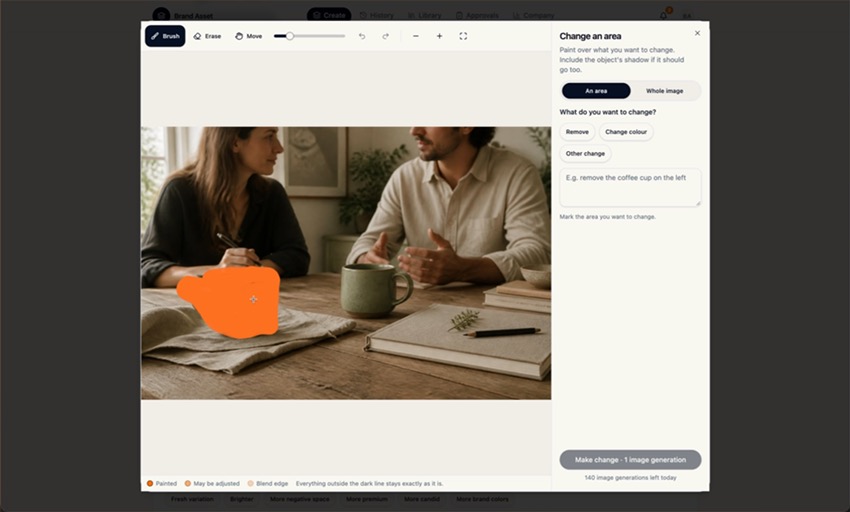
Edit a specific area
On the image card, choose Edit image → Change an area when available. Paint over the object with Brush and include its shadow if it should go too. Use Erase to correct the mask. Describe the change and run the edit. For example, mask the front mug and ask to remove it while keeping the rest of the scene.
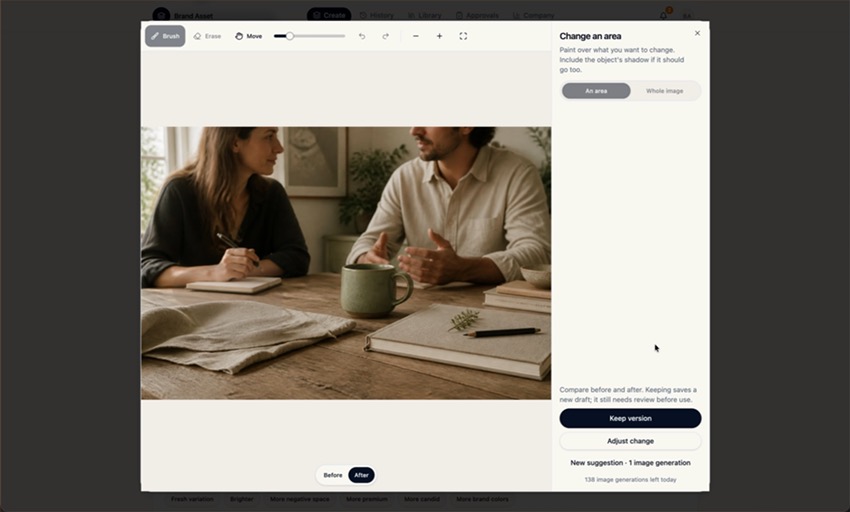
Edit the whole image and keep a version
Choose Edit image → Change the whole image when the adjustment affects the overall scene, such as making the light warmer. After either edit, use Before and After to check the result. Select Adjust change to revise the instruction, New suggestion to try again, or Keep version to save a new draft for review.
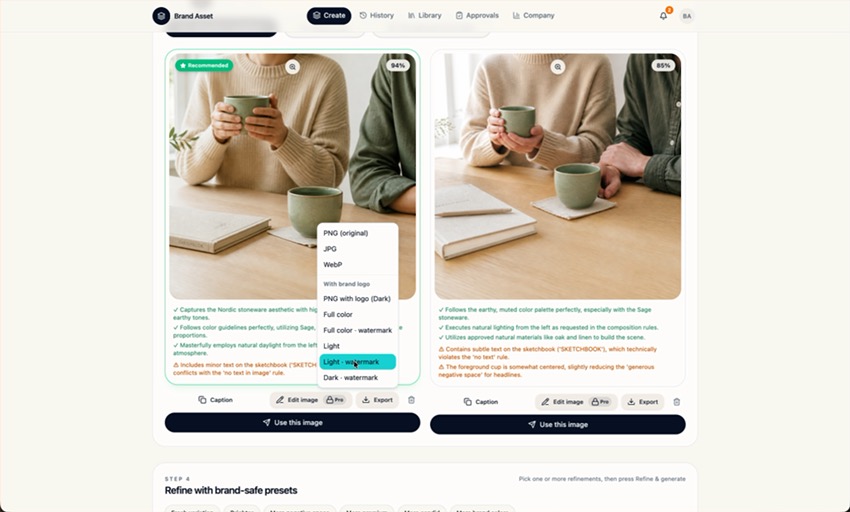
Export or copy the caption
Select Caption to copy the caption. Open Export to choose PNG (original), JPG or WebP, or use one of the available brand-logo or watermark variants. Check the exported image for logo contrast and placement. Follow your team’s approval rules before using an export.
Submit for approval
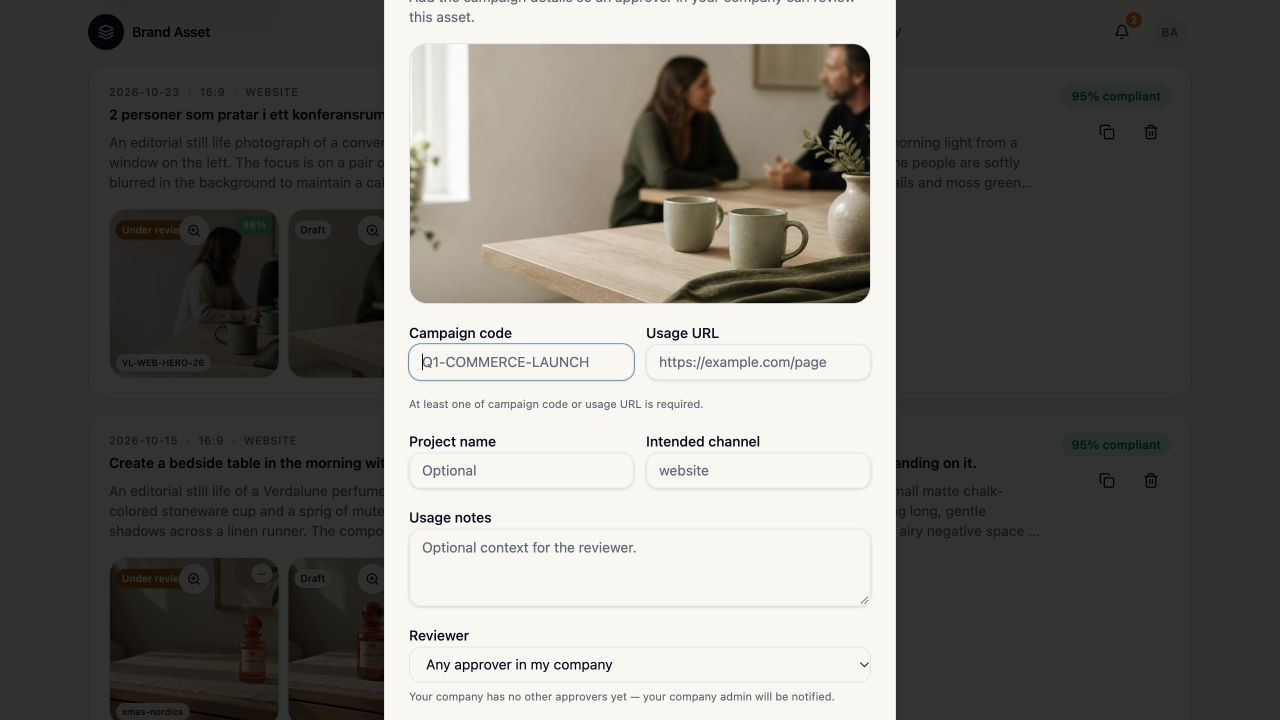
On the chosen result in Create, select Use this image. You can also use Submit on an eligible image in History. Enter a Campaign code or Usage URL. Add Project name, Intended channel and Usage notes as needed. In Reviewer, select a reviewer if offered or leave Any approver in my company. Check the routing note in the form, then select Submit for approval and confirm that the image was submitted.
Respond to feedback
Check the status in History. If changes were requested, read the reviewer’s comment, revise the image and submit a new revision. Check Library for approved images and follow your team’s publishing rules.
Generation, refinement, both editing modes, export and submission from Create were observed in the recordings. Editing and logo options depend on workspace settings.